Sphinx
Cài đặt Sphinx
Bước 1: Cài đặt Sphinx
apt-get install python3-sphinx
Ghi chú
Nếu chưa cài đặt python3 thì hãy cài đặt thêm python3.
sudo apt install python3.
sudo apt install python3-pip.
Bước 2: Tạo project
Ghi chú
Tạo một thư mục rồi tiếp tục những bước sau.
Cài đặt môi trường ảo và cài đặt Sphinx cho môi trường ảo
python -m venv .venv
source .venv/bin/activate
python -m pip install sphinx
Kiểm tra version của Sphinx
sphinx-build --version
Tạo project
Ghi chú
Lúc tạo project bằng lệnh dưới đây có thông báo gì thì cứ yes, và làm theo hướng dẫn của các thông báo.
sphinx-quickstart docs
Sau khi hoàn thành những bước trên sẽ được đươc cái folder trong folder vừa tạo như sau
.venv
docs
├── build
├── make.bat
├── Makefile
└── source
    ├── conf.py
    ├── index.rst
    ├── _static
    └── _templates
Ghi chú
Khi sử dụng Sphinx thì viết tài liệu trong file có đuôi rst. Đừng viết ở những file khác như : html, py.
Bước 3: Build project và mở file HTML
Ghi chú
Trước khi build project hay tải thư viện hãy kiểm tra là đã vào môi trường ảo hay chưa.
Nếu chưa vào môi trường ảo thì hãy vào môi trường ảo bằng lênh này:
source .venv/bin/activate.
Build project
sphinx-build -M html docs/source/ docs/build/
Mở file HTML
google-chrome docs/build/html/index.html
Ghi chú
Có thể sử dụng trình duyệt khác để mở file html
Bước 4: Sử dụng Theme RTD cho Project
Tải và cài đặt theme:
pip install sphinx-rtd-theme
Chỉnh sửa file
conf.pythành như sau:
# Configuration file for the Sphinx documentation builder.
#
# For the full list of built-in configuration values, see the documentation:
# https://www.sphinx-doc.org/en/master/usage/configuration.html

# -- Project information -----------------------------------------------------
# https://www.sphinx-doc.org/en/master/usage/configuration.html#project-information

project = 'Tutorial Zephyr in UBUNTU'
copyright = '2024, DONGKHOA'
author = 'DONGKHOA'
release = 'ver 1.0.1'

# -- General configuration ---------------------------------------------------

extensions = ["sphinx_rtd_theme",]

templates_path = ['_templates']
exclude_patterns = []

language = 'vi'
# -- Options for HTML output -------------------------------------------------

# The theme to use for HTML and HTML Help pages.  See the documentation for
# a list of builtin themes.
#
html_theme = 'sphinx_rtd_theme'
html_static_path = ['_static']
Ghi chú
Nhớ chỉnh lại các phần như author, project, release, copyright
Bước 5: Tạo thêm file để có thể deploy trên github
Tạo file sphinx.yml trong thư mục .github/workflows (tạo thêm). Có nội dung như sau:
name: "Sphinx: Render docs"

on: push

jobs:
build:
    runs-on: ubuntu-latest
    permissions:
    contents: write
    steps:
    -   uses: actions/checkout@v4
    -   name: Build HTML
        uses: ammaraskar/sphinx-action@master
    -   name: Upload artifacts
        uses: actions/upload-artifact@v4
        with:
            name: html-docs
            path: docs/build/html/
    -   name: Deploy
            uses: peaceiris/actions-gh-pages@v3
            if: github.ref == 'refs/heads/main'
            with:
                github_token: ${{ secrets.GITHUB_TOKEN }}
                publish_dir: docs/build/html
Do ở trên có sử dụng theme RTD nên cần phải thêm hai file requirements.in và
requirements.txt.
requirements.in
Sphinx>=5
sphinx_rtd_theme
requirements.txt
#
# This file is autogenerated by pip-compile with python 3.10
# To update, run:
#
#    pip-compile docs/requirements.in
#
alabaster==0.7.12
    # via sphinx
babel==2.10.3
    # via sphinx
certifi==2022.6.15
    # via requests
charset-normalizer==2.1.0
    # via requests
docutils==0.20.1
    # via
    #   sphinx
    #   sphinx-rtd-theme
idna==3.3
    # via requests
imagesize==1.4.1
    # via sphinx
jinja2==3.1.2
    # via sphinx
markupsafe==2.1.1
    # via jinja2
packaging==21.3
    # via sphinx
pygments==2.12.0
    # via sphinx
pyparsing==3.0.9
    # via packaging
pytz==2022.1
    # via babel
requests==2.28.1
    # via sphinx
snowballstemmer==2.2.0
    # via sphinx
sphinx==5.0.2
    # via
    #   -r docs/requirements.in
    #   sphinx-rtd-theme
sphinx-rtd-theme==2.0.0
    # via -r docs/requirements.in
sphinxcontrib-applehelp==1.0.2
    # via sphinx
sphinxcontrib-devhelp==1.0.2
    # via sphinx
sphinxcontrib-htmlhelp==2.0.0
    # via sphinx
sphinxcontrib-jsmath==1.0.1
    # via sphinx
sphinxcontrib-qthelp==1.0.3
    # via sphinx
sphinxcontrib-serializinghtml==1.1.5
    # via sphinx
urllib3==1.26.9
    # via requests
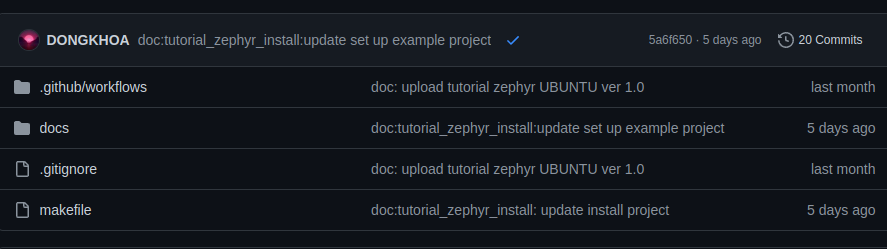
Project sau khi thêm các file sẽ như sau
.github
└── workflows
    └──sphinx.yml
.venv
docs
├── build
├── make.bat
├── Makefile
└── source
    ├── conf.py
    ├── index.rst
    ├── _static
    └── _templates
requirements.txt
requirements.in
Push project lên github.
Ghi chú
Không nên push folder .venv lên github. Có thể sử dụng file .gitignore.
Bước 6: Deploy trên github
Sau khi push lên github đợi github tạo ra một branch mới tên là gh-pages và làm theo hình sau
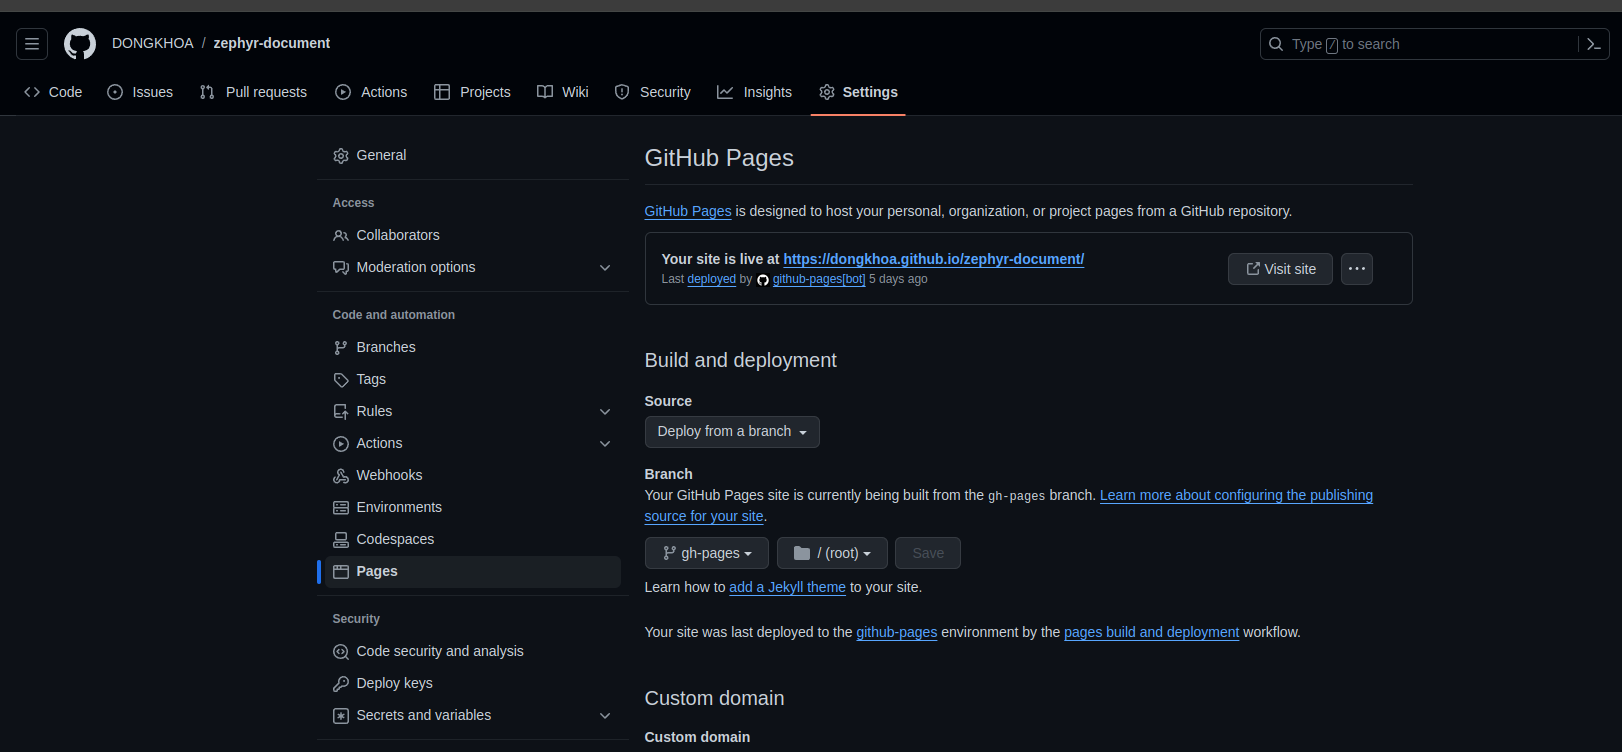
Sau khi build xong thì sẽ có link web tạo ra.